Have you ever stared up at the night sky and wished you could capture the beauty of the northern lights on paper? Well, grab your sketchbook and prepare for an artistic adventure. Drawing the aurora borealis may seem daunting, but with the right techniques and materials, you can create a stunning representation that would impress even the most seasoned artists. Whether you’re a beginner or looking to refine your skills, this guide will help you unleash your inner artist while providing a few chuckles along the way. Let’s jump into the mystical world of the northern lights.
Understanding the Northern Lights
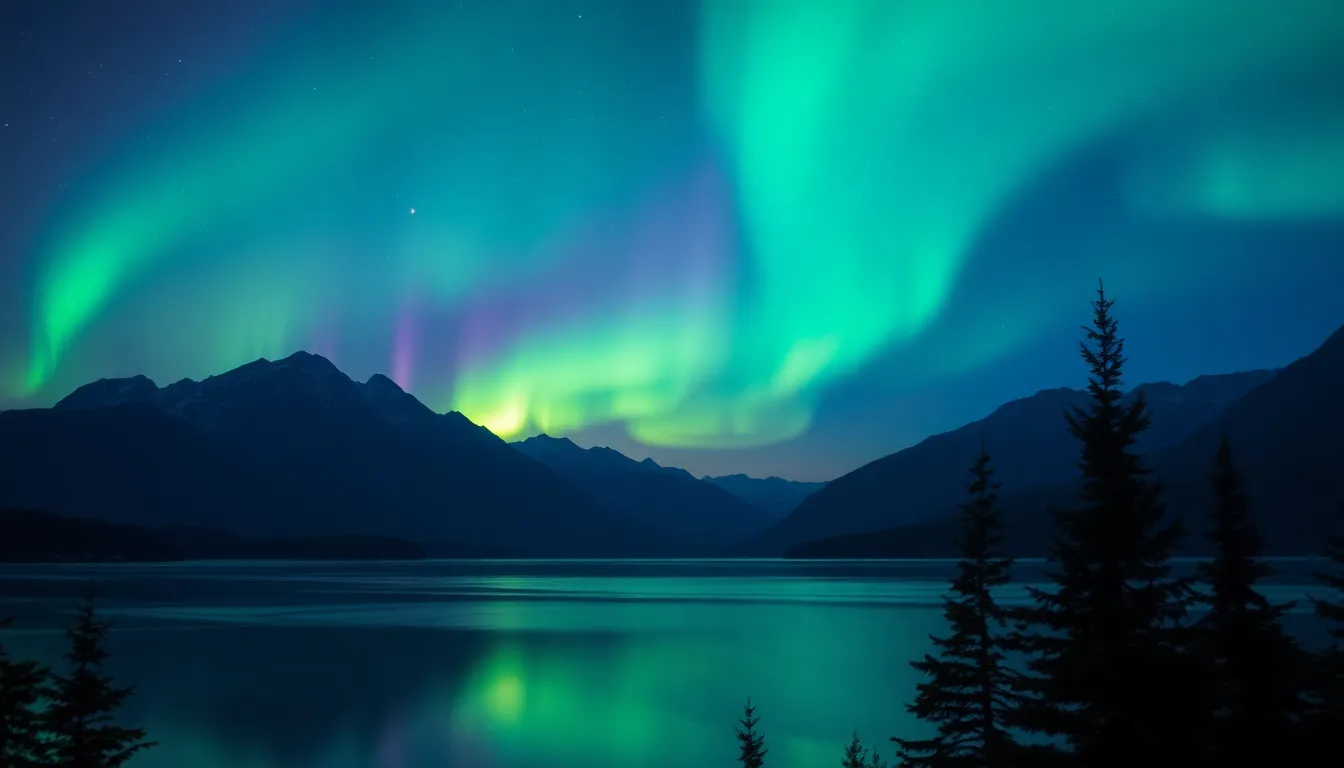
It’s also essential to consider how the lights interact with the environment. Mountain ranges, trees, and lakes reflect the colors and make them easier to appreciate. Getting familiar with these elements will provide your drawing with a richer context.
Gathering Your Materials
Now that you understand the northern lights, it’s time to gather your art supplies. You don’t need a fancy art studio to get started: just a few basic items can do wonders.
- Paper: Choose smooth watercolor paper or any thick sketch paper that can withstand layering.
- Pencils: A range of pencils will be useful, from hard for preliminary sketches to soft for shading.
- Color Media: Whether you prefer colored pencils, markers, watercolors, or even pastels, ensure you have a good selection. Each medium will offer different aesthetic qualities.
- Erasers: A kneaded eraser is great for gentle lifting, while a regular one can help remove mistakes.
- Blending Tools: Stumps or cotton swabs can help achieve soft edges, mimicking the blending of colors in the sky.
With these materials at hand, you’re ready to embark on your drawing journey.
Choosing the Right Techniques
Choosing the right techniques is crucial for capturing the essence of the northern lights. Here are a few methods to consider:
- Layering: Build color gradually. Start with light hues and work up to the more intense shades. This technique can help create depth and luminosity in your drawing.
- Blending: Use blending tools or your fingers to smooth out harsh lines between colors. This mimicry of the natural phenomenon’s fluidity makes your piece more lifelike.
- Sgraffito: This technique involves scratching through a layer of color to reveal the lighter underlayer. It’s excellent for adding texture and highlights.
- Dotting: For stars, try using a stippling method with white or light colors. This adds a magical touch to the dark sky, enhancing the brilliance of the northern lights.
Experiment with these techniques to find the ones that resonate with your style.
Step-By-Step Drawing Process
Let’s get down to the nitty-gritty. Here’s a step-by-step process to get you started on your northern lights drawing:
Step 1: Sketch the Horizon
Begin by lightly sketching the horizon line where the land meets the sky. This will anchor your composition.
Step 2: Outline the Lights
Use a soft pencil to sketch the general shapes of the aurora lights. Think sweeping curves and wavy lines.
Step 3: Add Base Colors
Select light greens and lavenders as your base colors. Apply these lightly across the areas where you want the northern lights to shine.
Step 4: Layering Colors
Once the base is dry (if using watercolors), gradually add deeper hues. Think rich emerald and deep violet to create drama and depth.
Step 5: Blend
Use your blending tool or fingers to softly merge the colors. Aim for seamless transitions to mimic the flowing nature of the aurora.
Step 6: Highlights
Add white or light yellow highlights to certain areas to capture the sparkle of the lights. This will add vibrancy and make your drawing pop.
Step 7: Final Touches
Use black or dark blues to outline the horizon and any prominent foreground elements. This contrast will pull the whole piece together.
Adding Background Elements
Once the northern lights are shining bright on your paper, consider adding some background elements. This can help provide context and enhance the overall composition.
- Mountains or Hills: Outline jagged peaks along the horizon. This not only grounds your drawing but also adds drama to the scene.
- Trees: Silhouettes of trees can create a beautiful contrast. Try adding evergreens with a bit of reflection from the lights above.
- Water Reflections: If your scene includes water, depicting the reflection of the colors below will elevate the artwork to a whole new level.
- Stars: A sprinkle of stars can add a finishing touch. Dot them gently across the sky, ensuring they feel random for a natural look.
These background elements will tie your artwork together, making the northern lights appear even more spectacular.
Tips for Enhancing Your Artwork
To elevate your drawing even further, here are some quick tips:
- Study Real Photos: Reference images can provide great inspiration and insight into color choices and patterns.
- Experiment with Color: Don’t be afraid to try unconventional hues. Sometimes the most unexpected colors can create the most striking effects.
- Practice Regularly: Like any skill, drawing improves with practice. Create multiple sketches to refine your technique and find your unique style.
- Join Art Communities: Sharing your work for feedback can provide valuable insights and encourage your growth as an artist.
Above all, enjoy the process. The journey of creating art is just as important as the final piece.